| Home | SOL9 C++ Class Library | SOL9 Samples | SOL9 FAQ | SOL9 ClassTree | SOL9 ClassList |
TCHAR type, _T macro and functions in tchar.h file.
1 Overview
1.1 Introduction
(1) Program Entry Point
In SOL9, the program entry point is Main, not WinMain.
The Main function is called automatically from WinMain function
which resides in SOL9 library.
void Main(int argc, TCHAR** argv) |
(2) Class Hierarchy Design
The design policy of SOL9 is based on the single inheritance
mechanism of C++.
The root class of SOL9 class hierarchy is class
Object. All other classes of SOL9 inherit the class Object.
(3) Class Application
You shall create an instance of class
Application to write a Windows application on SOL9.
The constructor of the Application initializes the class variables
in Application and loads some dynamic link libraries.The method run
of Application starts a Windows event handling loop.
Example
#include <sol/Application.h>

// Program Entry Point.
void    Main(int argc, TCHAR** argv)
{
    const TCHAR* name = _T("HelloWorld");
    // Create an instance of Application.
    Application applet(name, argc, argv);

    // Create an instance of your own Window class
    // which inherits class ApplicationView.

    // Enter SOL++ event handling loop.
    applet.run();
}
|
(4) Namespace 'SOL'
In SOL9, we have introduced C++ namespace 'SOL' to avoid collision of class names in Windows API.Please take care of using namespace 'SOL' when you define a class inheritting a SOL class.
Example
#include <sol/ApplicationView.h>
// This is a MainView class which inherits SOL::ApplicationView:

namespace SOL {

class MainView :publci ApplicationView {

public:
    //Constructor
    MainView(Application& applet, const TCHAR* caption, Args& args)
	:ApplicationView(applet, caption, args) {

    }
};
}

// Program Entry Point.
void    Main(int argc, TCHAR** argv)
{
    const TCHAR* name = _T("HelloWorld");
    // Create an instance of Application.
    Application applet(name, argc, argv);

    // Create an instance of your own Window class
    // which inherits class ApplicationView.
    Args args;
    MainView mainView(applet, _T("Demo"), args);
    mainView.realize();

    // Enter SOL++ event handling loop.
    applet.run();
}
|
(5) Console Application
You can create a console application by using ordinary main function on SOL9.
See the following example of SOL::URLEncoder class.
Example
// URLEncoding.cpp
//

//URLEncoder class is implemented on the following header file.
//So, you can compile this file 'URLEncoding.cpp' without linking sol32.lib
//in the following way on the Visual Studio command prompt:
// c:\work>cl /I c:\usr\include URLEncoding.cpp

#include <sol/URLEncoder.h>
#include <sol/String.h>

void _tmain(int argc, TCHAR* argv[])
{
    const char* string =
      "<html>\n"
      "<body>\n"
      "<h1>URLEncoder/URLDecoder test!</h1>\n"
      "<h2>1234567890</h2>\n"
      "<h3>ABCDEFGHIJKLMNOPQRSTUVWXYZ</h3>\n"
      "<h3>abcdefghijklmnopqrstuvwxyz</h3>\n"
      "<h3>!\"#$%&'()=~|0\\`{[]}+*<>?/_</h3>\n"
      "</body>\n"
      "</html>\n";

    String str = string;
    _tprintf(_T("Html=[%s]\n"), (const TCHAR*)str);

    // Create an object of URLEncoder class
    URLEncoder encoder;

    String enc;
    encoder.encode(string, enc);

    _tprintf(_T("URLEncoded=[%s]\n"), (const TCHAR*)enc);
}
|
1.2 Class Hierarchy
We show some typical classes in SOL9 and basic ideas to handle a Windows events.
(1) class Object
Class hierarchy
Object |
(2) class Application
Class hierarchy
Object | +-- Application |
(3) class View
Class hierarchy
Object | +-- Window | +-- View |
Event Handler
The class View of SOL9 has a list to add an event handler for a specified event such as WM_PAINTTo handle a Windows event in SOL9, you can register an event handler function to an instance of the View or its subclasses by calling the following addEventHandler method of class View. The SOL9 framework will call automatically each event handler stored in the View instance, corresponding to those Windows events.
addEventHandler(UINT message, Object* object, Handler method, void* data); message: A Windows message id defined windows.h file. object : A pointer to a class Object having an event handler. method : A method belonging to a class Object or subclass. data : A user data. |
Command/Notify Callback
The class View of SOL9 has a list to add a callback function for Windows WM_COMMAND and WM_NOTIFY messages. To handle a Windows message or event in SOL9, you can register your own callback function to an instance of the View or its subclasses by calling the following addCallback method of class View. The SOL++ framework will call automatically each callback function stored in the View instance, corresponding to those Windows messages.
addCallback(const TCHAR* name, Object* object, Callback method, void* data); name : Callback name (XmNsomething) defined in StrDef.h file. object : A pointer to a class Object having a callback function. method : A method belonging to a class Object or subclass. data : A user data. |
(4) class ApplicationView
Class hierarchy
Object | +--Window | +--View | +--Composite | +--ApplicationView |
Example
#include <sol\ApplicationView.h>

// Define a subclass of ApplicationView.
namespace SOL {

class MainView :public ApplicationView {
    // Event handler for WM_LBUTTONDOWN.
    long leftButtonDown(Event& event) {
        // Do something here.
        return 0L;
    }

  public:
    // Constructor
    MainView(Application& applet, const TCHAR* title, Args& args)
        :ApplicationView(applet, title, args)
    {
        // Register an event handler for WM_LBUTTONDOWN to this class.
        addEventHandler(WM_LBUTTONDOWN, this,
                (Handler)&MainView::leftButtonDown, null);
    }
 };
}
|
(5) class DC, class PaintDC, class ClientDC
Class hierarchy
Object | +--DC | +--PaintDC | +--ClientDC |
Note: Never forget to create an instance of class PaintDC on handling WM_PAINT event event if you have nothing to paint.
Example
#include <sol\ApplicationView.h>
#include <sol\PaintDC.h>

namespace SOL {

class MainView :public ApplicationView {
    // EventHandler for WM_PAINT.
    long  paint(Event& event) {
        // YOU SHALL CREATE AN INSTANCE OF PAINTDC.
        PaintDC pdc(this);
        return 0L;
    }

  public:
    // Constructor
    MainView(Application& applet, const TCHAR* title, Args& args)
        :ApplicationView(applet, title, args)
    {
        // Register an event handler for WM_PAINT to this class.
        addEventHandler(WM_PAINT, this, (Handler)&MainView::paint, null);
    }
 };
}
|
(6) class Button and subclasses
Class hierarchy
Object | +--Window | +--View | +--Primitive | +--Button | +--PushButton | +--GroupBox | +--IconButton | +--RadioButton | +--ToggleButton |
To create a window of those classes, you have to call a constructor or create method of those classes.
    Args ar;
    // Call a constructor taking three arguments.
    // This creates a window.
    PushButton* ok = new PushButton(parent, _T("OK"), ar);
|
    Args ar;
    // Call a constructor without arguments.
    // This does not create a window.
    PushButton ok;

    // Call a create method to create a window.
    ok.create(parent, _T("OK"), ar);
|
Example

#include <sol\ApplicationView.h>
#include <sol\PushButton.h>

namespace SOL {

class MainView :public ApplicationView {
    PushButton* ok;
    // Callback function.
    // This is called automatically by clicking ok button.
    void  accept(Action& action) {
        // Do something here.
    }

  public:
    // Constructor
    MainView(Application& applet, const TCHAR* title, Args& args)
        :ApplicationView(applet, title, args)
    {
        Args ar;
        // Create an instance of PushButton
        ar.set(XmNx, 10);
        ar.set(XmNy, 10);
        ok = new PushButton(this, _T("OK"), ar);

        // Register a callback function accept to the ok button.
        ok->addCallback(XmNactivateCallback, this,
                (Callback)&MainView::accept, null);
    }

    ~MainView()
    {
        delete ok;
    }
 };
}
|
1.3 Hello World
(1) Handling an event
As a first step of programming, we show the
source code of HelloWorld program written on SOL9.
This is a typical example of handling the WM_PAINT message in SOL9.
Example

#include <sol\ApplicationView.h>
#include <sol\PaintDC.h>

namespace SOL {


// Inherit ApplicationView which is a SOL++ TopLevelWindow class.
class HelloWorld :public ApplicationView {

    // EventHandler for WM_PAINT message!
    long paint(Event& event) {
        PaintDC pdc(this);
        TCHAR* text = _T("Hello World");
        pdc.textOut(10, 10, text, strlen(text));
        return 0L;
    }

  public:
    // Constructor
    HelloWorld(Application& applet, const TCHAR* name, Args& args)
        :ApplicationView(applet, name, args)
    {
        // Add an event handler paint to this class
        // to handle a WM_PAINT event.
        addEventHandler(WM_PAINT, this, (Handler)&HelloWorld::paint, null);
    }
};
}

// Program Entry Point.
void    Main(int argc, TCHAR** argv)
{
    const TCHAR* name = _T("HelloWorld");
    // Create an instance of Application.
    Application applet(name, argc, argv);

    Args args;
    // Create an instance of HelloWorld.
    HelloWorld helloWorld(applet, name, args);

    // Realize or show the helloWorld.
    helloWorld.realize();

    // Enter SOL++ event handling loop.
    applet.run();
}
|
1.4 PushButton
(1) Handling a callback
In SOL9, you can register a callback function(method) to each instance
of PushButton by using a name of XmNactivateCallback.
See \usr\sol\StrDef.h for a complete list of the names for callbacks.
This is a typical example of handling an activation callback for the buttons.Example

#include <sol\ApplicationView.h>
#include <sol\PushButton.h>

namespace SOL {


// Inherit ApplicationView which is a SOL++ TopLevelWindow class.
class ButtonSample :public ApplicationView {
    PushButton pushb;

    // Callback function to handle WM_COMMAND message.
    void  quit(Action& action) {
            // Call exit method of View to terminate this program.
            exit(action);
    }

  public:
    // Constructor
    ButtonSample(Application& applet, const TCHAR* name, Args& args)
        :ApplicationView(applet, name, args)
    {
        Args ar;
        ar.set(XmNx, 40);
        ar.set(XmNy, 20);
        // Create an instance of PushButton
        pushb.create(this, _T("Quit"), ar);

        // Register the method quit of this class to the pushb.
        // SOL9 frame work will call automatically the registered method
        // quit to the pushb whenever it is pushed!
        pushb.addCallback(XmNactivateCallback, this,
			(Callback)&ButtonSample::quit, null);
    }
 };
}

// Program Entry Point.
void    Main(int argc, TCHAR** argv)
{
    const TCHAR* name = _T("ButtonSample");
    // Create an instance of Application.
    Application applet(name, argc, argv);

    Args args;
    // Create an instance of HelloWorld.
    ButtonSample buttonSample(applet, name, args);

    // Realize or show the buttonSample.
    buttonSample.realize();

    // Enter SOL++ event handling loop.
    applet.run();
}
|
2 Controls
(1) Class hierachy
Object | +--Window | +--View | +--Primitive | +--ComboBox | +--ListBox | +--Static | +--Text | | | +--TextField | | | +--ScrolledText | +--Button | +--PushButton | +--GroupBox | +--IconButton | +--RadioButton | +--ToggleButton |
    Args ar;
    // Call a constructor taking three arguments.
    // This creates a window.
    PushButton* ok = new PushButton(parent, _T("OK"), ar);

    // Somewhere you have to delete the instance.
    delete ok;
|
    Args ar;
    // Call a constructor without arguments.
    // This does not create a window.
    PushButton ok;

    // Call a create method to create a window.
    ok.create(parent, _T("OK"), ar);
|
2.1 PushButton
(1) Explanation
Class PushButton represents a button control
with a style BS_PUSHBUTTON of Windows.
(2) Example
#include <sol\ApplicationView.h>
#include <sol\PushButton.h>

namespace SOL {

class MainView :public ApplicationView {
    PushButton pushb;

    // Callback function to handle WM_COMMAND message.
    void  activate(Action& action) {
            // Call exit method of View to terminate this program.
           // Write here your code to do something when the pushb is pushed.

    }
  public:
    // Constructor
    MainView(Application& applet, const TCHAR* name, Args& args)
        :ApplicationView(applet, name, args)
    {
        Args ar;
        // Create a window of PushButton
        pushb.create(this, _T("Quit"), ar);

        // Register the method quit of this class to the pushb.
        // SOL9 frame work will call automatically the registered method
        // activate to the pushb whenever it is pushed!
        pushb.addCallback(XmNactivateCallback, this,
				(Callback)&MainView::activate, null);
    }
};
}
|
2.2 IconButton
(1) Explanation
Class IconButton represents a button control
with a style BS_ICON of Windows.
(2) Example
#include <sol\ApplicationView.h>
#include <sol\IconButton.h>
#include "resource.h"

namespace SOL {

class MainView :public ApplicationView {
    IconButton iconButton;

    // Callback function to handle WM_COMMAND message.
    void  quit(Action& action) {
            // Call exit method of View to terminate this program.
            exit(action);
    }

  public:
    // Constructor
    MainView(Application& applet, const TCHAR* name, Args& args)
        :ApplicationView(applet, name, args)
    {
        Args ar;
        ar.set(XmNx, 10);
        ar.set(XmNy, 10);
        ar.set(XmNwidth, 32);
        ar.set(XmNheight, 32);
        ar.set(XmNxImageSize, 32);
        ar.set(XmNyImageSize, 32);
        ar.set(XmNimageName, IDI_ICON1);
        // Create a window of IconButton
        iconButton.create(this, _T(""), ar);

        // Register the method quit of this class to the iconButton.
        // SOL9 frame work will call automatically the registered method
        // quit to the iconButton whenever it is pushed!
        iconButton.addCallback(XmNactivateCallback, this,
			(Callback)&MainView::quit, null);
    }
};
}
|
2.3 RadioButton
(1) Explanation
Class RadioButton represents a button control
with a style BS_AUTORADIOBOX of Windows.
(2) Example

#include <sol\ApplicationView.h>
#include <sol\RadioButton.h>

namespace SOL {

class MainView :public ApplicationView {
    RadioButton  radioButton;

    // Callback function to handle WM_COMMAND message.
    void  clicked(Action& action) {
            // Is radioButton checked?
            int rc = radioButton.getCheck();
    }

  public:
    // Constructor
    MainView(Application& applet, const TCHAR* name, Args& args)
        :ApplicationView(applet, name, args)
    {
        Args ar;
        ar.set(XmNx, 20);
        ar.set(XmNy, 20);
        // Create a window of RadioButton
        radioButton.create(this, _T("RadioButton"), ar);

        // Register the method quit of this class to the radioButton.
        // SOL9 frame work will call automatically the registered method
        // clicked to the radioButton whenever it is pushed!
        radioButton.addCallback(XmNactivateCallback, this,
				(Callback)&MainView::clicked, null);
    }
};
}
|
2.4 ToggleButton
(1) Explanation
Class ToggleButton represents a button control
with a style BS_AUTOCHECKBOX of Windows.
(2) Example

#include <sol\ApplicationView.h>
#include <sol\ToggleButton.h>

namespace SOL {

class MainView :public ApplicationView {
    ToggleButton  toggleButton;

    // Callback function to handle WM_COMMAND message.
    void  clicked(Action& action) {
            // Is toggleButton checked?
            int rc = toggleButton.getCheck();
    }

  public:
    // Constructor
    MainView(Application& applet, const TCHAR* name, Args& args)
        :ApplicationView(applet, name, args)
    {
        Args ar;
        ar.set(XmNx, 20);
        ar.set(XmNy, 20);
        // Create a window of ToggleButton
        toggleButton.create(this, _T("Press"), ar);

        // Register the method quit of this class to the toggleButton.
        // SOL9 frame work will call automatically the registered method
        // clicked to the toggleButton whenever it is pushed!
        toggleButton.addCallback(XmNactivateCallback, this,
				(Callback)&MainView::clicked, null);
    }
};
}
|
2.5 GroupBox
(1) Explanation
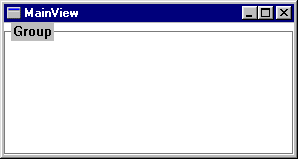
Class GroupBox represents a button control
with a style BS_GROUPBOX
of Windows. (2) Example
#include <sol\ApplicationView.h>
#include <sol\GroupBox.h>

namespace SOL {

class MainView :public ApplicationView {
    GroupBox groupBox;

  public:
    // Constructor
    MainView(Application& applet, const TCHAR* name, Args& args)
        :ApplicationView(applet, name, args)
    {
        Args ar;
        // Create a window of GroupBox
        groupBox.create(this, _T("Group"), ar);

        add(groupBox);
    }
};
}
|
2.6 Static
(1) Explanation
Class Static represents a static control of Windows.
(2) Example

#include <sol\ApplicationView.h>
#include <sol\Static.h>

namespace SOL {

class MainView :public ApplicationView {
    Static label;

  public:
    // Constructor
    MainView(Application& applet, const TCHAR* name, Args& args)
        :ApplicationView(applet, name, args)
    {
        Args ar;
        ar.set(XmNx, 100);
        ar.set(XmNy, 10);
        // Create a window of Static
        label.create(this, _T("Hello world"), ar);
    }
};
}
|
2.7 Text
(1) Explanation
Class Text represents an edit control of Windows.| Name | Description |
| XmNchangeCallback | Callback for WM_COMMAND/EN_CHANGE event. |
| XmNerrorSpaceCallback | Callback for WM_COMMAND/EN_ERRSPACE event. |
| XmNhorizScrollCallback | Callback for WM_COMMAND/EN_HSCROLL event. |
| XmNkillFocusCallback | Callback for WM_COMMAND/EN_KILLFOCUS event. |
| XmNmaxTextCallback | Callback for WM_COMMAND/EN_MAXTEXT event. |
| XmNsetFocusCallback | Callback for WM_COMMAND/EN_SETFOCUS event. |
| XmNupdateCallback | Callback for WM_COMMAND/EN_UPDATE event. |
| XmNvertScrollCallback | Callback for WM_COMMAND/EN_VSCROLL event. |
(2) Example

#include <sol\ApplicationView.h>
#include <sol\Text.h>

namespace SOL {

class MainView :public ApplicationView {
    Text text;

    // Callback function to handle WM_COMMAND/EN_MAXTEXT event.
    void  maxText(Action& action) {
            // Do something.
    }

  public:
    // Constructor
    MainView(Application& applet, const TCHAR* name, Args& args)
        :ApplicationView(applet, name, args)
    {
        Args ar;
        ar.set(XmNstyle, (ulong)ES_MULTILINE);
        // Create a window of Text.
        text.create(this, _T("Hello\r\nWorld"), ar);

        add(text);

        // Register the method maxText of this class to the text.
        // SOL9 frame work will call automatically the registered method
        // 'maxText' to the text whenever a WM_COMMAND/EN_MAXTEXT event occurs!
        text.addCallback(XmNmaxTextCallback, this,
				(Callback)&MainView::maxText, null);
    }
};
}
|
2.8 TextField
(1) Explanation
Class TextField represents an edit control for
single-line-editing
of Windows.(2) Example

#include <sol\ApplicationView.h>
#include <sol\TextField.h>

namespace SOL {

class MainView :public ApplicationView {
    TextField textField;

  public:
    // Constructor
    MainView(Application& applet, const TCHAR* name, Args& args)
        :ApplicationView(applet, name, args)
    {
        Args ar;
        ar.set(XmNx, 10);
        ar.set(XmNy, 20);
        ar.set(XmNwidth, 120);
        ar.set(XmNheight, 30);
        // Create a window of TextField
        textField.create(this, _T("Your name?"), ar);
    }
};
}
|
2.9 ScrolledText
(1) Explanation
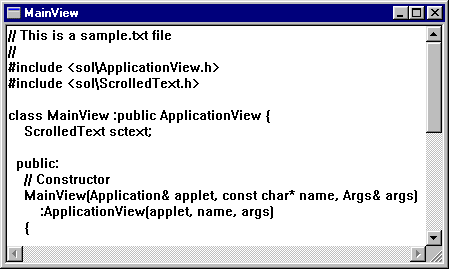
Class ScrolledText represents an edit control
with scrollbars
for multi-line-editing of Windows.You can use the callback names of the class Text, because this is a sublcass of Text.
(2) Example
#include <sol\ApplicationView.h>
#include <sol\ScrolledText.h>

namespace SOL {

class MainView :public ApplicationView {
    ScrolledText sctext;

  public:
    // Constructor
    MainView(Application& applet, const TCHAR* name, Args& args)
        :ApplicationView(applet, name, args)
    {
        Args ar;
        // Create a window of ScrolledText
        sctext.create(this, _T(""), ar);

        // Add the sctext to a default layout-manager.
        add(sctext);

        // Call the method load of class Text to read a
        //content of the file "sample.txt".
        sctext.load(_T("sample.txt"));
    }
};
}
|
2.10 ComboBox
(1) Explanation
Class ComboBox represents a combobox control of Windows.
| Name | Description |
| XmNcloseUpCallback | Callback for WM_COMMAND/CBN_CLOSEUP event. |
| XmNdefaultActionCallback | Callback for WM_COMMAND/CBN_DBLCLK event. |
| XmNdropDownCallback | Callback for WM_COMMAND/CBN_DROPDOWN event. |
| XmNeditChangeCallback | Callback for WM_COMMAND/CBN_EDITCHANGE event. |
| XmNeditUpdateCallback | Callback for WM_COMMAND/CBN_EDITUPDATE event. |
| XmNerrorSpaceCallback | Callback for WM_COMMAND/CBN_ERRSPACE event. |
| XmNkillFocusCallback | Callback for WM_COMMAND/CBN_KILLFOCUS event. |
| XmNselChangeCallback | Callback for WM_COMMAND/CBN_SELCHANGE event. |
| XmNselEndCancelCallback | Callback for WM_COMMAND/CBN_SELENDCANCEL event. |
| XmNselEndOkCallback | Callback for WM_COMMAND/CBN_SELENDOK event. |
| XmNsetFocusCallback | Callback for WM_COMMAND/CBN_SETFOCUS event. |
(2) Example

#include <sol\ApplicationView.h>
#include <sol\ComboBox.h>

namespace SOL {

class MainView :public ApplicationView {
    ComboBox    drives;

    // Callback function to handle WM_COMMAND/CBN_SELCHANGE message.
    void  selChanged(Action& action) {
            // Do something
    }

    // Build a list of logical dirves into the drives.
    void buildDriveList()
    {
        TCHAR path[10];
        DWORD d = ::GetLogicalDrives();
        for(int i = 0; i<26; i++) {
            if(d & 1) {
                _stprintf(path, _T("%c:"), 'A'+i);
                drives.addString(path);
            }
            d = d >> 1;
        }
    }

  public:
    // Constructor
    MainView(Application& applet, const TCHAR* name, Args& args)
        :ApplicationView(applet, name, args)
    {
        Args ar;
        ar.set(XmNwidth, 120);
        ar.set(XmNstyle, (ulong)CBS_DROPDOWNLIST);
        // Create a window of ComboBox
        drives.create(this, _T(""), ar);
        buildDriveList();

        // Register the method selChanged of this class to the drives.
        drives.addCallback(XmNselChangeCallback, this,
                            (Callback)&MainView::selChanged, null);
    }
};
}
|
2.11 ListBox
(1) Explanation
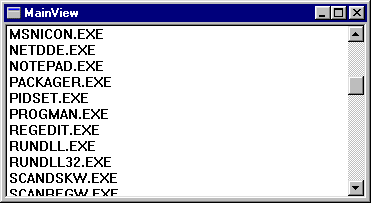
Class ListBox represents a scrollbar control of Windows.
| Name | Description |
| XmNdefaultActionCallback | Callback for WM_COMMAND/LBN_DBLCLK event. |
| XmNerrorSpaceCallback | Callback for WM_COMMAND/LBN_ERRSPACE event. |
| XmNkillFocusCallback | Callback for WM_COMMAND/LBN_KILLFOCUS event. |
| XmNselCancelCallback | Callback for WM_COMMAND/LBN_SELCANCEL event. |
| XmNselChangeCallback | Callback for WM_COMMAND/LBN_SELCHANGE event. |
| XmNsetFocusCallback | Callback for WM_COMMAND/LBN_SETFOCUS event. |
(2) Example
#include <sol\ApplicationView.h>
#include <sol\ListBox.h>

namespace SOL {

class MainView :public ApplicationView {
    ListBox listbox;

    // Callback function to handle WM_COMMAND message.
    void  doubleClicked(Action& action) {
        // Run the executable program.
        TCHAR buff[128];
        listbox.getCurText(buff);

        ::WinExec(buff, SW_SHOWNORMAL);
    }

  public:
    // Constructor
    MainView(Application& applet, const TCHAR* name, Args& args)
        :ApplicationView(applet, name, args)
    {
        Args ar;
        // Create a window of PushButton
        listbox.create(this, _T(""), ar);

        add(listbox);

        TCHAR buffer[128];
        ::GetWindowsDirectory(buffer, sizeof(buffer));
        strcat(buffer, _T("\\*.EXE"));
        // List up executable files of Windows.
        listbox.findFiles(buffer);

        // Register the method quit of this class to the pushb.
        // SOL9 framework will call automatically the registered method
        // doubleClicked to the listbox whenever an item is double-clicked!
        listbox.addCallback(XmNdefaultActionCallback, this,
                             (Callback)&MainView::doubleClicked, null);
    }
};
}
|
2.12 ScrollBar
(1) Explanation
Class ScrollBar represents a scrollbar control of Windows.
| Name | Description |
| XmNstyle | integer Direction(ScrollBar::Horizontal/ScrollBar::Vertical) |
| XmNminimum | integer Minimum value of scrolling. |
| XmNmaximum | integer Maximum value of scrolling. |
| XmNpageIncrement | integer Increment value of PAGE UP/DOWN event. |
| XmNlineIncrement | integer Increment value of LINE UP/DOWN event. |
| Name | Description |
| XmNhorizScrollCallback | Callback for WM_HSCROLL event. |
| XmNvertScrollCallback | Callback for WM_VSCROLL event. |
(2) Example

#include <sol\ApplicationView.h>
#include <sol\ScrollBar.h>

namespace SOL {

class MainView :public ApplicationView {
    ScrollBar scrollbar;

    // Callback function to handle Windows WM_HSCROLL event.
    void  horizScroll(Action& action) {
          // Do something when the scrollbar scrolled.
          // Get a thumb position by calling a getPos method.
          int pos = scrollbar.getPos();
    }

  public:
    // Constructor
    MainView(Application& applet, const TCHAR* name, Args& args)
        :ApplicationView(applet, name, args)
    {
        Args ar;
        ar.set(XmNx, 10);
        ar.set(XmNy, 10);
        ar.set(XmNwidth,  200);
        ar.set(XmNheight, 20);
        ar.set(XmNminimum,   0);
        ar.set(XmNmaximum, 255);
        ar.set(XmNstyle,   ScrollBar::HORIZONTAL);
        // Create a window of ScrollBar
        scrollbar.create(this, _T(""), ar);

        // Register the method horizScroll of this class
        //to the scrollbar.
        // SOL9 frame work will call automatically the registered method
        // horizScroll to the scrollbar whenever it is manipulated!
        scrollbar.addCallback(XmNhorizScrollCallback, this,
                                 (Callback)&MainView::horizScroll, null);
    }
};
}
|
3 CommonControls
(1) Class hierachy
Object | +--Window | +--View | +--Primitive | +--Animator | +--HotKey | +--IPAddressField | +--ListView | +--TreeView | +--Text | | | +--RichText | | | +--ScrolledRichText | +--StatusBar | +--ToolBar | +--Tab | +--ComboBox | +--ExtendedComboBox |
In these common control classes, you can use the following common names to add callbacks.
| Name | Description |
| XmNerrorSpaceCallback | Callback for WM_NOTIFY/NM_OUTOFMEMORY event. |
| XmNclickCallback | Callback for WM_NOTIFY/NM_CLICK event. |
| XmNdoubleClickCallback | Callback for WM_NOTIFY/NM_DBLCLK event. |
| XmNreturnCallback | Callback for WM_NOTIFY/NM_RETURN event. |
| XmNrightClickCallback | Callback for WM_NOTIFY/NM_RCLICK event. |
| XmNrightDoubleClickCallback | Callback for WM_NOTIFY/NM_RDBLCLK event. |
| XmNsetFocusCallback | Callback for WM_NOTIFY/NM_SETFOCUS event. |
| XmNkillFocusCallback | Callback for WM_NOTIFY/NM_KILLFOCUS event. |
3.1 Animator
(1) Explanation
Class Animator represents an animate control of Windows.
(2) Example
#include <sol\ApplicationView.h>
#include <sol\Animator.h>

namespace SOL {

class MainView :public ApplicationView {
    Animator animator;

  public:
    // Constructor
    MainView(Application& applet, const TCHAR* name, Args& args)
        :ApplicationView(applet, name, args)
    {
        Args ar;
        // Create a window of Animator
        animator.create(this, NULL, ar);

        add(animator);
        animator.open(_T("sample.avi"));
        animator.play(0, -1, -1);
    }
};
}
|
3.2 HotKey
(1) Explanation
Class HotKey represents a hotkey control of Windows.
(2) Example

#include <sol\ApplicationView.h>
#include <sol\HotKey.h>

namespace SOL {

class MainView :public ApplicationView {
    HotKey  hotkey;
    WORD    keyComb;

    // Event handler for WM_SYSCOMMAND event.
    // If this event is caused by the keyComb combination, iconify this window.
    long    sysCommand(Event& event) {
        if(event.getWParam() == SC_HOTKEY) {
            show(SW_MINIMIZE);
            return NULL;
        }
        else {
            return defaultProc(event);
        }
    }

  public:
    // Constructor
    MainView(Application& applet, const TCHAR* name, Args& args)
        :ApplicationView(applet, name, args)
    {
        Args ar;
        // Create a window of HotKey
        ar.set(XmNwidth,  100);
        ar.set(XmNheight, 30);
        ar.set(XmNexStyle, (ulong)WS_EX_WINDOWEDGE);
        hotkey.create(this, _T(""), ar);
        hotkey.setHotKey('X', HOTKEYF_CONTROL);

        keyComb =   MAKEWORD('X', HOTKEYF_CONTROL);
        // Set the key combination keyComb to this Window.
        this -> send(WM_SETHOTKEY, keyComb, 0);
        // Register an event handler for WM_SYSCOMMAND.
        addEventHandler(WM_SYSCOMMAND, this, (Handler)&MainView::sysCommand, NULL);
    }
};
}
|
3.3 IPAddressField
(1) Explanation
Class IPAddressField represents an ipaddress control of Windows.
(2) Example

#include <sol\ApplicationView.h>
#include <sol\IPAddressField.h>

namespace SOL {

class MainView :public ApplicationView {
    IPAddressField addressField;

  public:
    // Constructor
    MainView(Application& applet, const TCHAR* name, Args& args)
        :ApplicationView(applet, name, args)
    {
        Args ar;
        // Create a window of IPAddressField.
        ar.set(XmNx, 10);
        ar.set(XmNy, 10);
        ar.set(XmNwidth, 200);
        ar.set(XmNheight, 30);
        addressField.create(this, NULL, ar);

        // Set an IP address.
        addressField.setAddress(255, 255, 255, 0);
    }
};
}
|
3.4 ListView
(1) Explanation
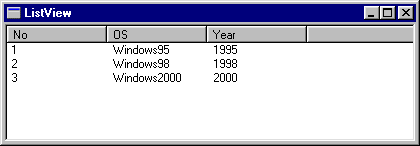
Class ListView represents a listview control of Windows.
| Name | Description |
| XmNitemChangingCallback | Callback for WM_NOTIFY/LVN_ITEMCHANGING event. |
| XmNitemChangedCallback | Callback for WM_NOTIFY/LVN_ITEMCHANGED event. |
| XmNinsertItemCallback | Callback for WM_NOTIFY/LVN_INSERTITEM event. |
| XmNdeleteItemCallback | Callback for WM_NOTIFY/LVN_DELETEITEM event. |
| XmNdeleteAllItemsCallback | Callback for WM_NOTIFY/LVN_DELETEALLITEMS event. |
| XmNbeginLabelEditCallback | Callback for WM_NOTIFY/LVN_BEGINLABELEDIT event. |
| XmNenableEditCallback | Callback for WM_NOTIFY/LVN_ENDLABELEDIT event. |
| XmNcolumnClickCallback | Callback for WM_NOTIFY/LVN_COLUMNCLICK event. |
| XmNbeginDragCallback | Callback for WM_NOTIFY/LVN_BEGINDRAG event. |
| XmNbeginRDragCallback | Callback for WM_NOTIFY/LVN_BEGINRDRAG event. |
| XmNgetDispInfoCallback | Callback for WM_NOTIFY/LVN_GETDISPINFO event. |
| XmNsetDispInfoCallback | Callback for WM_NOTIFY/LVN_SETDISPINFO event. |
| XmNkeyDownCallback | Callback for WM_NOTIFY/LVN_KEYDOWN event. |
(2) Example
#include <sol\ApplicationView.h>
#include <sol\ListView.h>

namespace SOL {

class MainView :public ApplicationView {
    ListView listview;

    // Callback to handle WM_NOTIFY/NM_DBLCLK event.
    void doubleClicked(Action& action) {
        // Do something.
    }

    // Callback to handle WM_NOTIFY/LVN_ITEMCHANGED event.
    void itemChanged(Action& action) {
        Event& event = action.getEvent();
        NM_LISTVIEW* nm = (NM_LISTVIEW*)event.getLParam();
        // Get an index of the changed item.
        int changedItem = nm->iItem;
    }

  public:
    // Constructor
    MainView(Application& applet, const TCHAR* name, Args& args)
        :ApplicationView(applet, name, args)
    {
        Args ar;
        // Create a window of ListView.
        ar.set(XmNexStyle, (ulong)WS_EX_CLIENTEDGE);
        ar.set(XmNstyle, (ulong)LVS_REPORT);
        listview.create(this, NULL, ar);

        // Set a column.
        static TCHAR* column[] = {_T("No"), _T("OS"),       _T("Year")};
        listview.setColumn(column, 3);

        // Set data.
        static TCHAR* lines1[] = {_T("1"), _T("Windows95"), _T("1995")};
        static TCHAR* lines2[] = {_T("2"), _T("Windows98"), _T("1998")};
        static TCHAR* lines3[] = {_T("3"), _T("Windows2000"), _T("2000")};

        listview.insertLine(0, lines1, 3);
        listview.insertLine(1, lines2, 3);
        listview.insertLine(2, lines3, 3);

        add(listview);

        // Add doubleClick and itemChanged callbacks of this class
        // to the listview.
        listview.addCallback(XmNdoubleClickCallback, this,
                        (Callback)&MainView::doubleClicked, null);
        listview.addCallback(XmNitemChangedCallback, this,
                        (Callback)&MainView::itemChanged, null);
    }
};
}
|
3.5 TreeView
(1) Explanation
Class TreeView represents a treeview control of Windows.
| Name | Description |
| XmNselChangingCallback | Callback for WM_NOTIFY/TVN_SELCHANGING event. |
| XmNselChangedCallback | Callback for WM_NOTIFY/TVN_SELCHANGED event. |
| XmNgetDispInfoCallback | Callback for WM_NOTIFY/TVN_GETDISPINFO event. |
| XmNsetDispInfoCallback | Callback for WM_NOTIFY/TVN_SETDISPINFO event. |
| XmNitemExpandingCallback | Callback for WM_NOTIFY/TVN_ITEMEXPANDING event. |
| XmNitemExpandedCallback | Callback for WM_NOTIFY/TVN_ITEMEXPANDED event. |
| XmNbeginDragCallback | Callback for WM_NOTIFY/TVN_BEGINDRAG event. |
| XmNbeginRDragCallback | Callback for WM_NOTIFY/TVN_BEGINRDRAG event. |
| XmNdeleteItemCallback | Callback for WM_NOTIFY/TVN_DELETEITEM event. |
| XmNbeginLabelEditCallback | Callback for WM_NOTIFY/TVN_BEGINLABELEDIT event. |
| XmNendLabelEditCallback | Callback for WM_NOTIFY/TVN_ENDLABELEDIT event. |
| XmNkeyDownCallback | Callback for WM_NOTIFY/TVN_KEYDOWN event. |
(2) Example
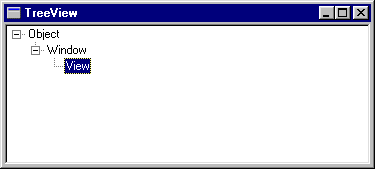
#include <sol\ApplicationView.h>
#include <sol\TreeView.h>

namespace SOL {

class MainView :public ApplicationView {
    TreeView treeview;

    // Callback to handle WM_NOTIFY/TVN_BEGINLABELEDIT event.
    void beginLabelEdit(Action& action) {
        Event& event = action.getEvent();
        TV_DISPINFO* dispInfo = (TV_DISPINFO*)event.getLParam();
        TV_ITEM item = dispInfo-> item;
        // Do something.

        action.setResult(0); // Return 0 to enable a label-edit.
    }

    // Callback to handle WM_NOTIFY/TVN_ENDLABELEDIT event.
    void endLabelEdit(Action& action) {
        Event& event = action.getEvent();
        TV_DISPINFO* dispInfo = (TV_DISPINFO*)event.getLParam();
        TV_ITEM item = dispInfo-> item;
        if(item.pszText) {
            // Set a mask TFIF_TEXT to set the text.
            item.mask = TVIF_TEXT;
            treeview.setItem(&item);
        }
    }

  public:
    // Constructor
    MainView(Application& applet, const TCHAR* name, Args& args)
        :ApplicationView(applet, name, args)
    {
        Args ar;
        // Create an instance of TreeView.
        ar.set(XmNexStyle, (ulong)WS_EX_CLIENTEDGE);
        ar.set(XmNstyle, (ulong)TVS_HASLINES|TVS_HASBUTTONS|TVS_LINESATROOT|TVS_EDITLABELS);
        treeview.create(this, _T(""), ar);

        add(treeview);

        // Add items.
        HTREEITEM root = treeview.addItem(NULL, TVI_ROOT, _T("Object"));
        HTREEITEM window = treeview.addItem(root,TVI_FIRST, _T("Window"));
        treeview.addItem(window,TVI_FIRST, _T("View"));

        // Add beginLabelEdit and endLabelEdit callbacks of this class to the treeview.
        treeview.addCallback(XmNbeginLabelEditCallback, this,
                        (Callback)&MainView::beginLabelEdit, null);
        treeview.addCallback(XmNendLabelEditCallback, this,
                        (Callback)&MainView::endLabelEdit, null);
    }
};
}
|
3.6 RichText
(1) Explanation
Class RichText represents a richtext control of Windows.
| Name | Description |
| XmNchangeCallback | Callback for WM_COMMAND/EN_CHANGE event. |
| XmNerrorSpaceCallback | Callback for WM_COMMAND/EN_ERRSPACE event. |
| XmNhorizScrollCallback | Callback for WM_COMMAND/EN_HSCROLL event. |
| XmNkillFocusCallback | Callback for WM_COMMAND/EN_KILLFOCUS event. |
| XmNmaxTextCallback | Callback for WM_COMMAND/EN_MAXTEXT event. |
| XmNsetFocusCallback | Callback for WM_COMMAND/EN_SETFOCUS event. |
| XmNupdateCallback | Callback for WM_COMMAND/EN_UPDATE event. |
| XmNvertScrollCallback | Callback for WM_COMMAND/EN_VSCROLL event. |
| XmNcorrectTextCallback | Callback for WM_NOTIFY/EN_CORRECTTEXT event. |
| XmNdropFilesCallback | Callback for WM_NOTIFY/EN_DROPFILES event. |
| XmNmsgFilterCallback | Callback for WM_NOTIFY/EN_MSGFILTER event. |
| XmNprotectedCallback | Callback for WM_NOTIFY/EN_PROTECTED event. |
| XmNrequestResizeCallback | Callback for WM_NOTIFY/EN_REQUESTRESIZE event. |
| XmNstopNoUndoCallback | Callback for WM_NOTIFY/EN_STOPNOUNDO event. |
| XmNselChangeCallback | Callback for WM_NOTIFY/EN_SELCHANGE event. |
(2) Example

#include <sol\ApplicationView.h>
#include <sol\Font.h>
#include <sol\ClientDC.h>
#include <sol\RichText.h>

namespace SOL {

class MainView :public ApplicationView {
    int        textHeight;
    Font       font;
    RichText   richText;

     // Override size method of Composite class to layout the richText.
    long        size(Event& event) {
        int w, h;
        event.getSize(w, h);
        richText.reshape(0, 0, w, textHeight+4);
        return 0L;
    }

  public:
    // Constructor
    MainView(Application& applet, const TCHAR* name, Args& args)
        :ApplicationView(applet, name, args)
    {
        Args ar;
        ar.set(XmNheight, (-12));
        //Create an instance of Font.
        font.create(ar);

        ClientDC dc(this);
        HFONT prevFont = (HFONT)dc.select(&font);
        textHeight = dc.getTextHeight();
        dc.select(prevFont);
        ar.reset();

        // Create a window of RichText.
        richText.create(this, _T(""),   ar);
        // Set the font to the richText.
        richText.setFont(font);

        // Set a string to the richText.
        richText.setText(_T("Input your name here."));
    }
};
}
|
3.7 ScrolledRichText
(1) Explanation
Class ScrolledRichText represents a richtext control with
vertial and horizontal scrollbars of Windows.
(2) Example

#include <sol\ApplicationView.h>
#include <sol\ScrolledRichText.h>

namespace SOL {

class MainView :public ApplicationView {
    ScrolledRichText   richText;

  public:
    // Constructor
    MainView(Application& applet, const TCHAR* name, Args& args)
        :ApplicationView(applet, name, args)
    {
        Args ar;
        // Create a window of ScrolledRichText.
        richText.create(this, _T(""),   ar);
        richText.exLimitText(1000*100);
        add(richText);

        // Read a file into the richText in RTF format.
        richText.streamIn(_T("sample.rtf"), SF_RTF);

        // Write the content of the richText into a file in TEXT format.
        richText.streamOut(_T("sampe.txt"), SF_TEXT);

    }
};
}
|
3.8 StatusBar
(1) Explanation
Class StatusBar represents a statusbar control of Windows.
There are two ways to add an instance of StatusBar to ApplicationView or its subclass.
void Main(int argc, TCHAR** argv)
{
    const TCHAR* name = _T("Sample");
    Application applet(name, argc, argv);
    Args args;
    arg.set(XmNdefaultStatusBar, True);
    ApplicationView appView(applet, name, args);
    //
}
|
(2) Example

#include <sol\ApplicationView.h>

namespace SOL {

class MainView :public ApplicationView {
    int          sizeArray[3];
    StatusBar*   statusbar;

    // Override size method of Composite class to fix the size of
    // each part of the statusbar.
    long    size(Event& event) {
        ApplicationView::size(event);
        LPARAM s = event.getLParam();
        // Set the size of parts of the statusbar.
        sizeArray[0] = LOWORD(s)/3;
        sizeArray[1] = LOWORD(s)*2/3;
        sizeArray[2] = -1;
        statusbar->setParts(3, sizeArray);
        return 0L;
    }

  public:
    // Constructor
    MainView(Application& applet, const TCHAR* name, Args& args)
        :ApplicationView(applet, name, args)
    {
        Args ar;
        // Create an instance of StatusBar.
        statusbar = new StatusBar(this, _T("Hello"), ar);
        // Set the statusbar to this Window.
        // You never delete the statusbar after calling setStatusBar method.
        setStatusBar(statusbar);
        statusbar -> setParts(3, sizeArray);
        statusbar -> setText(0,  0, _T("Normal"));
        statusbar -> setText(1, SBT_POPOUT,    _T"(Popout"));
        statusbar -> setText(2, SBT_NOBORDERS, _T("Noborder"));
    }
    ~MainView() {
       // Never delete the statusbar, because it will be deleted automatically
       // in the destructor of ApplicationView.
    }
};
}
|
3.9 ToolBar
(1) Explanation
Class ToolBar represents a toolbar control of Windows.
There are two ways to add an instance of ToolBar to ApplicationView or its subclass.
void Main(int argc, TCHAR** argv)
{
    const TCHAR* name = _T("Sample");
    Application applet(name, argc, argv);

    Args args;
    args.set(XmNdefaultToolBar, True);
    // The attribute of name XmNtoolBarBitmapID takes a value
    // IDB_STD_SMALL_COLOR,IDB_STD_LARGE_COLOR or a handle for bitmap.
    args.set(XmNtoolBarBitmapID, IDB_STD_SMALL_COLOR);
    ApplicationView appView(applet, name, args);
    //
}
|
| Name | Description |
| XmNgetButtonInfoCallback | Callback for WM_NOTIFY/TBN_GETBUTTONINFO event. |
| XmNbeginDragCallback | Callback for WM_NOTIFY/TBN_BEGINDRAG event. |
| XmNendDragCallback | Callback for WM_NOTIFY/TBN_ENDDRAG event. |
| XmNbeginAdjustCallback | Callback for WM_NOTIFY/TBN_BEGINADJUST event. |
| XmNendAdjustCallback | Callback for WM_NOTIFY/TBN_ENDADJUST event. |
| XmNresetCallback | Callback for WM_NOTIFY/TBN_RESET event. |
| XmNqueryInsertCallback | Callback for WM_NOTIFY/TBN_QUERYINSERT event. |
| XmNqueryDeleteCallback | Callback for WM_NOTIFY/TBN_QUERYDELETE event. |
| XmNtoolbarChangeCallback | Callback for WM_NOTIFY/TBN_TOOLBARCHANGE event. |
| XmNcustHelpCallback | Callback for WM_NOTIFY/TBN_CUSTHELP event. |
(2) Example

#include <sol\ApplicationView.h>
#include <sol\ToolBar.h>
#include <sol\ScrolledRichText.h>

namespace SOL {

class MainView :public ApplicationView {
    ScrolledRichText richText;
    ToolBar*         toolbar;

    // Override size method of Composite class to layout the richText.
    long    size(Event& event) {
        ApplicationView::size(event);
        RECT r;
        toolbar -> getWindowRect(&r);

        DWORD s = event.getLParam();
        richText.reshape(0, r.bottom-r.top, LOWORD(s),  HIWORD(s)-(r.bottom-r.top));
        return 0L;
    }

  public:
    // Constructor
    MainView(Application& applet, const TCHAR* name, Args& args)
        :ApplicationView(applet, name, args)
    {
        Args ar;
        richText.create(this, _T(""), ar);

        ar.reset();
        // Create an instance of ToolBar.
        toolbar = new ToolBar(this, _T(""), ar);
        // Set the toolbar to this Window.
        // You never delete the toolbar after calling setToolBar method.
        setToolBar(toolbar);
    }
    ~MainView() {
       // Never delete the toolbar, because it will be deleted automatically
       // in the destructor of ApplicationView.
    }
};
}
|
3.10 Tab
(1) Explanation
Class Tab represents a tab control of Windows.
| Name | Description |
| XmNkeyDownCallback | Callback for WM_NOTIFY/TCN_KEYDOWN event. |
| XmNselChangeCallback | Callback for WM_NOTIFY/TCN_SELCHANGE event. |
| XmNselChangingCallback | Callback for WM_NOTIFY/TCN_SELCHANGING event. |
(2) Example
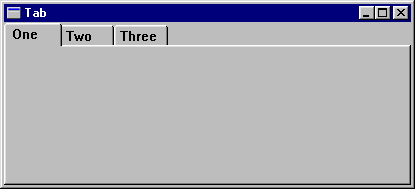
#include <sol\ApplicationView.h>
#include <sol\Tab.h>

namespace SOL {

class MainView :public ApplicationView {
    Tab     tab;

    // Callback to handle WM_NOTIFY/TCN_SELCHANGE event.
    void   select(Action& action) {
        int indx = tab.getCurFocus();
        // Do something.
    }

  public:
    // Constructor
    MainView(Application& applet, const TCHAR* name, Args& args)
        :ApplicationView(applet, name, args)
    {
        Args ar;
        // Create a window of ToolBar.
        tab.create(this, _T(""), ar);
        tab.setItemSize(50, 20);
        add(tab);

        static TCHAR* tabLabels[] = {_T("One"), _T("Two"), _T("Three")};
        // Add a label for each item.
        for(int i = 0; i < XtNumber(tabLabels); i++) {
            tab.addItem(tabLabels[i]);
        }
        tab.setCurFocus(0);

        // Register select callback of this class to the tab.
        tab.addCallback(XmNselChangeCallback, this,
			(Callback)&MainView::select, NULL);
    }
};
}
|
3.11 ExtendedComboBox
(1) Explanation
Class ExtendedComboBox represents a comboboxex control of Windows.
| Name | Description |
| XmNcloseUpCallback | Callback for WM_COMMAND/CBN_CLOSEUP event. |
| XmNdefaultActionCallback | Callback for WM_COMMAND/CBN_DBLCLK event. |
| XmNdropDownCallback | Callback for WM_COMMAND/CBN_DROPDOWN event. |
| XmNeditChangeCallback | Callback for WM_COMMAND/CBN_EDITCHANGE event. |
| XmNeditUpdateCallback | Callback for WM_COMMAND/CBN_EDITUPDATE event. |
| XmNerrorSpaceCallback | Callback for WM_COMMAND/CBN_ERRSPACE event. |
| XmNkillFocusCallback | Callback for WM_COMMAND/CBN_KILLFOCUS event. |
| XmNselChangeCallback | Callback for WM_COMMAND/CBN_SELCHANGE event. |
| XmNselEndCancelCallback | Callback for WM_COMMAND/CBN_SELENDCANCEL event. |
| XmNselEndOkCallback | Callback for WM_COMMAND/CBN_SELENDOK event. |
| XmNsetFocusCallback | Callback for WM_COMMAND/CBN_SETFOCUS event. |
| XmNbeginEditCallback | Callback for WM_NOTIFY/CBEN_BEGINEDIT event. |
| XmNdeleteItemCallback | Callback for WM_NOTIFY/CBEN_DELETEITEM event. |
| XmNdragBeginCallback | Callback for WM_NOTIFY/CBEN_DRAGBEGIN event. |
| XmNendEditCallback | Callback for WM_NOTIFY/CBEN_ENDEDIT event. |
| XmNgetDispInfoCallback | Callback for WM_NOTIFY/CBEN_GETDISPINFO event. |
| XmNinsertItemCallback | Callback for WM_NOTIFY/CBEN_INSERTITEM event. |
(2) Example
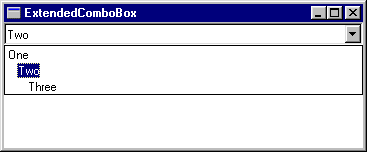
#include <sol\ApplicationView.h>
#include <sol\ExtendedComboBox.h>

namespace SOL {

class MainView :public ApplicationView {
    ExtendedComboBox   comboBox;

    // Callback to handle WM_COMMAND/CBN_SELCHANGE event.
    void   selected(Action& action) {
        int indx = comboBox.getCurSel();
        // Do something.
    }

  public:
    // Constructor
    MainView(Application& applet, const TCHAR* name, Args& args)
        :ApplicationView(applet, name, args)
    {
        Args ar;
        // Create a window of ToolBar.
        ar.set(XmNstyle, (ulong)CBS_DROPDOWNLIST);
        ar.set(XmNheight, 100);
        comboBox.create(this, _T(""), ar);

        add(comboBox);

        // Register selected callback of this class to the comboBox.
        comboBox.addCallback(XmNselChangeCallback, this, (Callback)selected, null);

        COMBOBOXEXITEM item;
        memset(&item, 0, sizeof(item));
        item.mask= CBEIF_TEXT|CBEIF_INDENT;

        static TCHAR* items[] = {_T("One"), _T("Two"), _T("Three")};
        // Add items to the comboBox.
        for(int i = 0; i < XtNumber(items); i++) {
            item.pszText = items[i];
            item.cchTextMax = strlen(items[i]);
            item.iItem      = i;
            item.iIndent    = i;
            comboBox.insertItem(&item);
        }
    }
};
}
|
4 Dialog
(1) Class hierachy
Object | +--Window | +--View | +--Composite | +--PopupView | +--DialogView | +--ModalDialog | | | +--AboutDialog | +--ModelessDialog |
4.1 PopupView
(1) Explanation
Class PopupView represents a window with a style WS_POPUP.
| Method | Description |
| popup | Pop up a window in the center position of its parent window. |
| popupAt | Pop up a window in the center of screeen. |
| popupAsItIs | Pop up a window in its own position. |
(2) Example
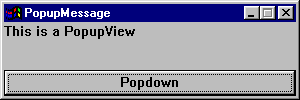
#include <sol\ApplicationView.h>
#include <sol\BorderLayout.h>
#include <sol\PushButton.h>
#include <sol\PopupView.h>
#include <sol\Static.h>

namespace SOL {

class PopupMessage :public PopupView {
    Static       message;
    PushButton   ok;
    BorderLayout layout;
  public:
    PopupMessage() { }

    Boolean create(View* parent, const TCHAR* title, Args& args)
    {
        PopupView::create(parent, title, args);
        setLayout(&layout);
        Args ar;
        message.create(this, _T(""), ar);
        add(message, BorderLayout::CENTER);

        ar.reset();
        ok.create(this, _T("Popdown"), ar);
        add(ok, BorderLayout::SOUTH);
        // Call resize method to layout imediately.
        resize();

        // Register callback to ok button to pop down this window.
        ok.addCallback(XmNactivateCallback, this,
                        (Callback)&PopupMessage::popdown, null);
        return True;
    }

    void    setMessage(const TCHAR* text) {
        message.setText(text);
    }
};


class MainView :public ApplicationView {
    PushButton    popupb;
    PopupMessage  message;

  public:
    // Constructor
    MainView(Application& applet, const TCHAR* name, Args& args)
        :ApplicationView(applet, name, args)
    {
        Args ar;
        // Create an instance of ToolBar.
        popupb.create(this, _T("Popup a PopupMessage"), ar);
        add(popupb);

        ar.reset();
        ar.set(XmNwidth,  300);
        ar.set(XmNheight, 100);
        ar.set(XmNstyle, (ulong)WS_THICKFRAME|WS_MINIMIZEBOX|WS_SYSMENU);
        message.create(this, _T("PopupMessage"), ar);
        message.setMessage("This is a PopupView"));

        // Register popup callback of PopupView class to the popupb.
        popupb.addCallback(XmNactivateCallback, &message,
                (Callback)&PopupView::popup, NULL);
    }
};
}
|
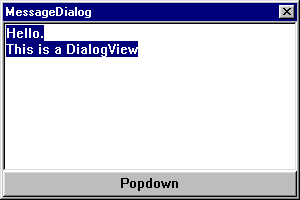
4.2 DialogView
(1) Explanation
Class DialogView represents a window with a style
of WS_POPUP and an extended style WS_EX_MODALFRAME.
(2) Example
#include <sol\ApplicationView.h>
#include <sol\BorderLayout.h>
#include <sol\ScrolledText.h>
#include <sol\PushButton.h>
#include <sol\DialogView.h>

namespace SOL {

class MessageDialog :public DialogView {
    BorderLayout layout;
    Text         message;
    PushButton   ok;

  public:
    MessageDialog(View* parent, const TCHAR* title, Args& args)
        :DialogView(parent, title, args)
    {
        setLayout(&layout);
        Args ar;
        ar.set(XmNstyle, (ulong)ES_MULTILINE);
        message.create(this, _T(""), ar);
        add(message, BorderLayout::CENTER);

        ar.reset();
        ok.create(this, _T("Popdown"), ar);
        add(ok, BorderLayout::SOUTH);

        resize();
        //Register callback to ok button to pop down this window.
        ok.addCallback(XmNactivateCallback, this,
			(Callback)&MessageDialog::popdown, null);
    }

    void setMessage(const TCHAR* text) {
        message.setText(text);
    }
};


class MainView :public ApplicationView {
    PushButton    popupb;
    MessageDialog  message;

  public:
    // Constructor
    MainView(Application& applet, const TCHAR* name, Args& args)
        :ApplicationView(applet, name, args)
    {
        Args ar;
        popupb.create(this, _T("Popup a MessageDialog"), ar);
        add(popupb);

        ar.reset();
        ar.set(XmNx, 100);
        ar.set(XmNy, 100);
        ar.set(XmNwidth,  300);
        ar.set(XmNheight, 200);
        message.create(this, _T("MessageDialog"), ar);
        message.setMessage(_T("Hello.\r\nThis is a DialogView"));

        // Register popup callback of PopupView class to the popupb.
        popupb.addCallback(XmNactivateCallback, &message,
            (Callback)&PopupView::popupAsItIs, NULL);
    }
};
}
|
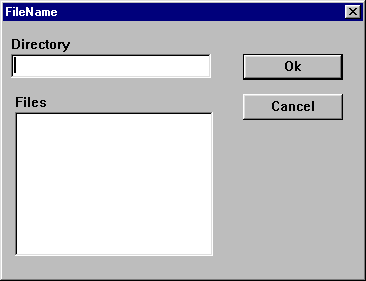
4.3 ModalDialog
(1) Explanation
Class ModalDialog represents a modal dialog window with a style
of WS_POPUP.
| Name | Description |
| XmNcentering | Flag that the dialog is to be centered or not on screen. |
| XmNfocusId | Specify a control id to get a focus when the dialog is to be visible. |
| XmNtemplateName | Specify template name of dialog. |
(2) Example
#include <sol\ApplicationView.h>
#include <sol\ModalDialog.h>
#include <sol\PushButton.h>
#include <sol\TextField.h>

#include "resource.h"

namespace SOL {

//Define a subclass which inherits ModalDialog.
class FileNameDialog :public ModalDialog {
    PushButton* ok;
    TextField*  name;

    void    doclose(Action& action) {
        // Do something here when ok is clicked.
    }
    //Override initDialog method of ModalDialog.
    long    initDialog(Event& event) {
        delete ok;
        delete name;
        //Create instances from dialog template.
        ok   = new PushButton(this, getItem(IDOK));
        name = new TextField(this, getItem(IDC_EDIT));
        //Register doclose callback to the ok button.
        ok -> addCallback(XmNactivateCallback, this,
			(Callback)&FileNameDialog::doclose, null);
    }
  public:
    FileNameDialog(View* parent, const TCHAR* title, Args& args)
        :ModalDialog(parent, title, args.set(XmNtemplateName, _T("FileName"))
    {
        ok   = null;
        name = null;
    }

    ~FileNameDialog() {
        delete ok;
        delete name;
    }
};


class MainView :public ApplicationView {
    PushButton      popupb;
    FileNameDialog*  dialog;

  public:
    // Constructor
    MainView(Application& applet, const TCHAR* name, Args& args)
        :ApplicationView(applet, name, args)
    {
        Args ar;
        popupb.create(this, _T("Popup a ModalDialog"), ar);
        add(popupb);

        ar.reset();
        dialog = new FileNameDialog(this, _T("Dialog"), ar);

        // Register popup callback of PopupView class to the popupb.
        popupb.addCallback(XmNactivateCallback, dialog,
                    (Callback)&PopupView::popup, NULL);
    }

    ~MainView() { delete dialog; }

};
}
|
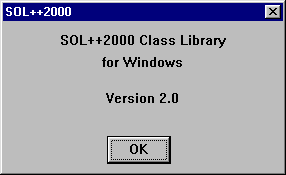
4.4 AboutDialog
(1) Explanation
Class AboutDialog represents a modal dialog window with a style
of WS_POPUP.
AboutDialog::AboutDialog(View* parent, const TCHAR* name, Args& args)
    :ModalDialog(parent, name, args.set(XmNfocusId, (ulong)IDOK))
{
    addCallback(XmNactivateCallback, IDCANCEL, this,
            (Callback)&AboutDialog::popdown, NULL);

    addCallback(XmNactivateCallback, IDOK, this,
            (Callback)&AboutDialog::popdown, NULL);
}
|
(2) Example
#include <sol\ApplicationView.h>
#include <sol\AboutDialog.h>
#include <sol\PushButton.h>

#include "resource.h"

namespace SOL {

class MainView :public ApplicationView {
    AboutDialog*  dialog;

  public:
    // Constructor
    MainView(Application& applet, const TCHAR* name, Args& args)
        :ApplicationView(applet, name, args)
    {
        Args ar;
        ar.reset();
        ar.set(XmNtemplateName, _T("About"));
        dialog = new AboutDialog(this, _T("Dialog"), ar);

        // Register popup callback of AboutDialog class to a menu of ID_ABOUT.
        addCallback(XmNmenuCallback, ID_ABOUT, dialog,
                    (Callback)&AboutDialog::popup, NULL);
    }

    ~MainView() { delete dialog; }
};
}
|
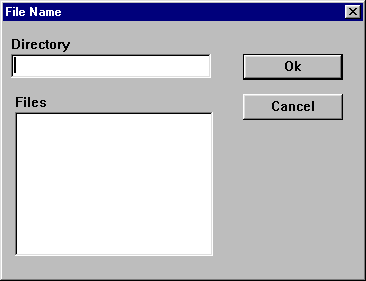
4.5 ModelessDialog
(1) Explanation
Class ModelessDialog represents a modeless dialog
window with a style
of WS_POPUP.
| Name | Description |
| XmNfocusId | Specify a control id to get a focus when the dialog is to be visible. |
| XmNtemplateName | Specify template name of dialog. |
(2) Example
#include <sol\ApplicationView.h>
#include <sol\ModelessDialog.h>
#include <sol\PushButton.h>
#include <sol\TextField.h>

#include "resource.h"

namespace SOL {

//Define a subclass which inherits ModelessDialog.
class FileNameDialog :public ModelessDialog {
    PushButton* ok;
    TextField*  name;

    void    doclose(Action& action) {
        // Do something here when ok is clicked.
    }

  public:
    FileNameDialog(View* parent, const TCHAR* title, Args& args)
        :ModelessDialog(parent, title, args.set(XmNtemplateName, _T("FileName"))
    {
        //Here, you can create instances from dialog template
        // in ModelessDialog.
        ok   = new PushButton(this, getItem(IDOK));
        name = new TextField(this, getItem(IDC_EDIT));
        ok -> addCallback(XmNactivateCallback, this,
			(Callback)&FileNameDialog::doclose, null);

        //Register doclose callback to a button of IDOK.
        addCallback(XmNactivateCallback, IDOK, this,
			(Callback)&FileNameDialog::doclose, null);
    }

    ~FileNameDialog() {
        delete ok;
        delete name;
    }
};


class MainView :public ApplicationView {
    PushButton      popupb;
    FileNameDialog  dialog;

  public:
    // Constructor
    MainView(Application& applet, const TCHAR* name, Args& args)
        :ApplicationView(applet, name, args)
    {
        Args ar;
        popupb.create(this, _T("Popup a ModelessDialog"), ar);
        add(popupb);

        ar.reset();
        dialog = new ModelessDialog(this, _T("Dialog"), ar);

        // Register popup callback of PopupView class to the popupb.
        popupb.addCallback(XmNactivateCallback, dialog,
                    (Callback)&PopupView::popup, NULL);
    }
    ~MainView() { delete dialog; }
};
}
|
5 CommonDialog
(1) Class hierachy
Object | +--Window | +--View | +--CommonDialog | +--FileDialog | +--ColorDialog | +--FindDialog | +--ReplaceDialog | +--FontDialog | +--PrintDialog | +--PageSetupDialog |
5.1 FileDialog
(1) Explanation
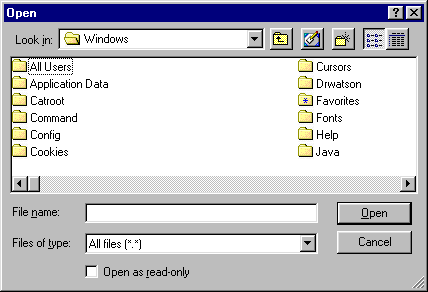
Class FileDialog represents a common file-selecting dialog of Windows.
| Name | Description |
| XmNextension | Specify a string for an extension of a file name. |
| XmNaccessMode | Specify an open or save mode by FileDialog::OPEN or FileDialog::SAVE. |
| XmNfileName | Specify a file name. |
| XmNdirectory | Specify a directory name. |
| XmNfilter | Specify a filter pattern string. |
| XmNfilterIndex | Specify an index of filter pattern string. |
| XmNdialogTitle | Specify a title string of FileDialog. |
(2) Example
#include <sol\ApplicationView.h>
#include <sol\ScrolledText.h>
#include <sol\FileDialog.h>

#include "resource.h"

namespace SOL {

class MainView :public ApplicationView {
    ScrolledText   sctext;
    FileDialog     filedlg;
    // Menu callback to popup the filedlg.
    void    open(Action& action)
    {
        // Call popup method to show the modal filedlg.
        filedlg.popup(action);

        if (action.getResult()) {
            // If any file selected, load it into ScrolledText.
            sctext.load(filedlg.getFileName());
        }
    }

  public:
    MainView(Application& applet, const TCHAR* name, Args& args)
        :ApplicationView(applet, name, args)
    {
        Args ar;
        sctext.create(this, _T(""), ar);
        add(sctext);

        ar.reset();
        // Specify FileDialog::OPEN mode for an accessMode.
        ar.set(XmNaccessMode, FileDialog::OPEN);
        filedlg.create(this, NULL, ar);

        addCallback(XmNmenuCallback, ID_OPEN, this, (Callback)&MainView::open, NULL);
        addCallback(XmNmenuCallback, ID_EXIT, this, (Callback)&MainView::exit, NULL);
    }
};
}
|
5.2 ColorDialog
(1) Explanation
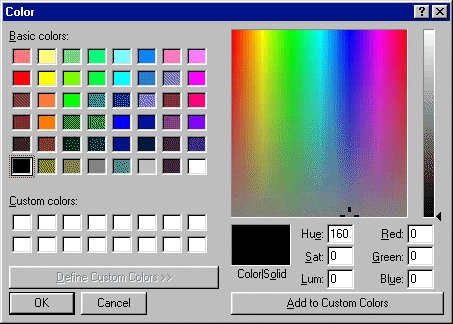
Class ColorDialog represents a common color-choosing dialog of Windows.
(2) Example
#include <sol\ApplicationView.h>
#include <sol\ColorDialog.h>
#include <sol\Brush.h>
#include <sol\PaintDC.h>

namespace SOL {

class MainView :public ApplicationView {
    COLORREF        color;
    ColorDialog    colordlg;

    //Eventhandler for WM_PAINT.
    long    paint(Event& event)
    {
        PaintDC pdc(this);
        Brush brush(color);
        HGDIOBJ prev = pdc.select(&brush);
        pdc.ellipse(0, 0, 100, 50);
        pdc.select(prev);
        return 0L;
    }

    //Callback to popup the colordlg.
    void    setColor(Action& action)
    {
        //Popup the colordlg.
        colordlg.popup(action);

        //Get a selected color from the colordlg.
        color = colordlg.getRGBResult();

        //Cause WM_PAINT by invalidating this window.
        update(NULL);
    }

  public:
    MainView(Application& applet, const TCHAR* name, Args& args)
        :ApplicationView(applet, name, args)
    {
        color = RGB(0, 0, 255);
        Args ar;
        colordlg.create(this, _T(""), ar);

        addCallback(XmNmenuCallback, ID_COLOR, this, (Callback)&MainView::setColor, null);
        addEventHandler(WM_PAINT, this, (Handler)&MainView::paint, null);
    }
};
}
|
5.3 FindDialog
(1) Explanation
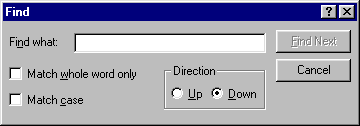
Class FindDialog represents a common find dialog of Windows.
| Name | Description |
| XmNflags | Specify a search direction by FR_DOWN or FR_UP. |
| XmNfindString | Specify a string to find. |
(2) Example
#include <sol\ApplicationView.h>
#include <sol\ScrolledText.h>
#include <sol\FindDialog.h>

#include "resource.h"

namespace SOL {

class MainView :public ApplicationView {
    UINT            findMsg;
    ScrolledText   text;
    FindDialog     findDialog;
    //Eventhandler for the findMsg Event.
    long    search(Event& event) {
        DWORD flag = findDialog.getFlag();
        TCHAR* find = findDialog.getFindString();
        if(strlen(find) > 0 && (flag & FR_DOWN)) {
            //Do search find string in text.
        } else {
            // FR_UP case is not supported.
            MessageBeep(-1);
        }
        return 0L;
    }

    //Menu callback to popup the findDialog.
    void    find(Action& action) {
        if(!findDialog.isWindow()) {
            findDialog.find(_T(""));
        }
    }

  public:
    //Constructor
    MainView(Application& applet, const TCHAR* name, Args& args)
        :ApplicationView(applet, name, args)
    {
        Args ar;
        ar.set(XmNnoHideSel, True);
        text.create(this, _T(""), ar);
        add(text);

        //Register a message of FINDMSSGSTRING.
        findMsg = RegisterWindowMessage(FINDMSGSTRING);

        ar.reset();
        ar.set(XmNflags, FR_DOWN);
        findDialog.create(this, _T(""), ar);
        //Register find callback to popup the findDialog.
        addCallback(XmNmenuCallback, ID_FIND, this, (Callback)&MainView::find, null);

        //Register search eventhandler to kick a real search operation.
        addEventHandler(findMsg, this, (Handler)&MainView::search, null);
    }
};
}
|
5.4 ReplaceDialog
(1) Explanation
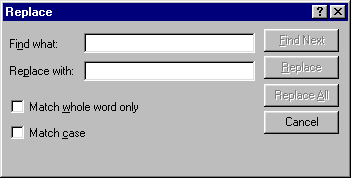
Class ReplaceDialog represents a common replace dialog of Windows.
| Name | Description |
| XmNflags | Specify a find and replace operation by FR_*. |
| XmNfindString | Specify a string to find. |
| XmNreplaceString | Specify a string to replace. |
(2) Example
#include <sol\ApplicationView.h>
#include <sol\ScrolledText.h>
#include <sol\ReplaceDialog.h>

namespace SOL {

class MainView :public ApplicationView {
    UINT            findMsg;
    ScrolledText   text;
    ReplaceDialog  replaceDialog;
    //Eventhandler for the findMsg Event.
    long    search(Event& event) {
        Args ar;
        TCHAR* find = null;
        TCHAR* replace = null;
        ulong  flags;
        ar.set(XmNflags, (void*)&flags);
        ar.set(XmNfindString, (TCHAR**)&find);
        ar.set(XmNreplaceString, (TCHAR**)&replace);
        replaceDialog.getValues(ar);

        if (flags & FR_DIALOGTERM) {
            // cancel
            return 0L;
        }
        if (flags & FR_FINDNEXT) {
            // find next
        }
        if (flags & FR_REPLACE) {
            // replace and find next
        }
        if (flags & FR_REPLACEALL) {
            // replace all
        }
        return 0L;
    }

    //Menu callback to popup the replaceDialog.
    void    replace(Action& action) {
        if(!replaceDialog.isWindow()) {
            // Popup the replaceDialog
            replaceDialog.replace(_T(""), _T(""));
        }
    }

  public:
    //Constructor
    MainView(Application& applet, const TCHAR* name, Args& args)
        :ApplicationView(applet, name, args)
    {
        Args ar;
        ar.set(XmNnoHideSel, True);
        text.create(this, _T(""), ar);
        add(text);

        //Register a message of FINDMSSGSTRING.
        findMsg = RegisterWindowMessage(FINDMSGSTRING);

        ar.reset();
        replaceDialog.create(this, _T(""), ar);
        //Register replace callback to popup the replaceDialog.
        addCallback(XmNmenuCallback, ID_REPLACE, this, (Callback)&MainView::replace, null);

        //Register search eventhandler to start a find-replace operation.
        addEventHandler(findMsg, this, (Handler)&MainView::search, null);
    }
};
}
|
5.5 FontDialog
(1) Explanation
Class FontDialog represents a common font dialog of Windows.
| Name | Description |
| XmNflags | Specify a type or effect of font by CF_*. |
| XmNtype | Specify a type of font(default value is SCREEN_FONTTYPE). |
| XmNminimum | Specify a minimum size of font. |
| XmNmaximum | Specify a maximum size of font. |
(2) Example
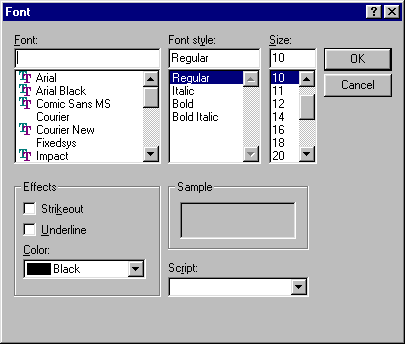
#include <sol\ApplicationView.h>
#include <sol\ScrolledText.h>
#include <sol\FontDialog.h>
#include <sol\Font.h>

#include "resource.h"

namespace SOL {

class MainView :public ApplicationView {
    ScrolledText  text;
    FontDialog    fontDialog;
    Font*         font;

    //Menu callback to popup the fontDialog and set a font to the text.
    void setFont(Action& action) {
        fontDialog.popup(action);
        if (action.getResult()) {
            delete font;
            font = fontDialog.getFont();
            text.setFont(font);
        }
    }

  public:
    //Constructor
    MainView(Application& applet, const TCHAR* name, Args& args)
        :ApplicationView(applet, name, args)
    {
        font = null;
        Args ar;
        ar.set(XmNnoHideSel, True);
        text.create(this, _T(""), ar);
        add(text);

        ar.reset();
        fontDialog.create(this, NULL, ar);

        //Register setFont callback to popup the fontDialog.
        addCallback(XmNmenuCallback, ID_SETFONT, this, (Callback)&MainView::setFont, null);

    }

    ~MainView() {
        delete font;
    }
};
}
|
5.6 PrintDialog
(1) Explanation
Class PrintDialog represents a common print dialog of Windows.
| Name | Description |
| XmNflags | Specify a flag by PD_*(default value is PD_RETURNDC). |
| XmNdc | Specify a device context(used in getValues). |
(2) Example
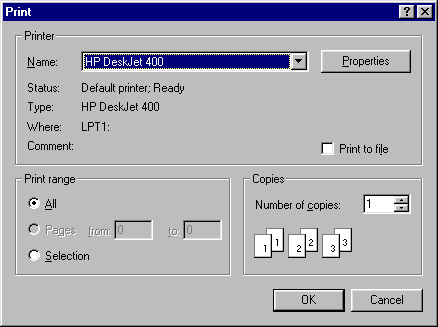
#include <sol\ApplicationView.h>
#include <sol\PrintDialog.h>

#include "resource.h"

namespace SOL {

class MainView :public ApplicationView {
    PrintDialog    printDialog;

    //Menu callback to popup the printDialog and print a text.
    void    print(Action& action)
    {
        printDialog.popup(action);
        if (action.getResult()) {
            HDC hdc = printDialog.getDC();
            DOCINFO docInfo;
            memset(&docInfo, 0, sizeof(DOCINFO));
            docInfo.cbSize = sizeof(DOCINFO);
            docInfo.lpszDocName = "Text";

            StartDoc(hdc, &docInfo);
            StartPage(hdc);

            TCHAR* text = _T("Hello world");
            TextOut(hdc, 200, 200, text, strlen(text));
            EndPage(hdc);
            EndDoc(hdc);
        }
    }

  public:
    //Constructor
    MainView(Application& applet, const TCHAR* name, Args& args)
        :ApplicationView(applet, name, args)
    {
        Args ar;
        printDialog.create(this,_T(""), ar);

        //Register print callback to popup the printDialog.
        addCallback(XmNmenuCallback, ID_PRINT, this,
            (Callback)&MainView::print, null);
    }
};
}
|
5.7 PageSetupDialog
(1) Explanation
Class PageSetupDialog represents a common page-setup
dialog of Windows.
| Name | Description |
| XmNflags | Specify a flag by PSD_*(default value is PSD_DEFAULTMINMARGINS|PSD_INHUNDREDTHSOFMILLIMETERS). |
(2) Example
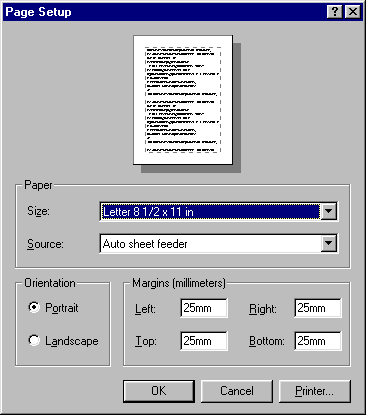
#include <sol\ApplicationView.h>
#include <sol\ScrolledText.h>
#include <sol\PageSetupDialog.h>
#include "resource.h"

namespace SOL {

class MainView :public ApplicationView {
    ScrolledText    text;
    PageSetupDialog pageSetup;

    //Menu callback to popup the pageSetup.
    void    setup(Action& action) {
        pageSetup.popup(action);
        if(action.getResult()) {
            MessageBox(NULL, _T("PageSetup OK"), _T("Sample"), MB_OK);
        }
    }

  public:
    //Constructor
    MainView(Application& applet, const TCHAR* name, Args& args)
        :ApplicationView(applet, name, args)
    {
        Args ar;
        ar.set(XmNexStyle, (ulong)WS_EX_ACCEPTFILES);
        text.create(this, _T(""), ar);

        add(text);

        ar.reset();
        pageSetup.create(this, _T(""), ar);

        //Register setup callback to popup the pageSetup.
        addCallback(XmNmenuCallback, ID_OPTION_SETUP, this,
                (Callback)&MainView::setup, null);
    }
};
}
|
6 GDI Object
(1) Class hierachy
Object | +--Resource | +--GdiObject | +--StockObject | +--Pen | +--Brush | +--Font | +--Bitmap | +--DIBitmap |
6.1 StockObject
(1) Explanation
Class StockObject represents a stock-object of Windows.
To use StockObject class, follow the below steps:Step1: Create an instance of a subclass(PaintDC or ClientDC) of DC.
Step2: Create an instance of StockObject.
Step3: Call select method of DC class to select the StockObject instance for the DC instance.
Step4: Call a drawing method of the DC instance.
Step5: Deselect the StockObject instance from the DC instance.
(2) Example
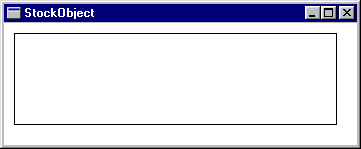
#include <sol\ApplicationView.h>
#include <sol\PaintDC.h>
#include <sol\StockObject.h>

namespace SOL {

class MainView :public ApplicationView {

    // Eventhandler to handle WM_PAINT event.
    long    paint(Event& event)
    {
        //Create an instance of PaintDC.
        PaintDC pdc(this);
        RECT    r;
        getClientRect(&r);
        int w = r.right-r.left;
        int h = r.bottom-r.top;

        //Create a hollow brush.
        StockObject pen(HOLLOW_BRUSH);
        //Select the pen for PaintDC.
        HGDIOBJ prev = pdc.select(&pen);

        //Draw a rectangle.
        pdc.rectangle(10, 10, w-20, h-20);

        //Deselect the pen from PaintDC.
        pdc.select(prev);

        return 0L;
    }

  public:
    MainView(Application& applet, const TCHAR* label, Args& args)
        :ApplicationView(applet, label, args)
    {
        // Register paint method of this class for the WM_PAINT event.
        addEventHandler(WM_PAINT, this, (Handler)&MainView::paint, null);
    }
};
}
|
6.2 Pen
(1) Explanation
Class Pen represents a pen object of Windows.
To use Pen class, follow the below steps:Step1: Create an instance of a subclass(PaintDC or ClientDC) of DC.
Step2: Create an instance of Pen.
Step3: Call select method of DC class to select the pen instance for the DC instance.
Step4: Call a drawing method of the DC instance.
Step5: Deselect the Pen instance from the DC instance.
(2) Example
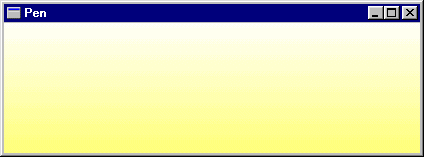
#include <sol\ApplicationView.h>
#include <sol\PaintDC.h>
#include <sol\Pen.h>

namespace SOL {

class MainView :public ApplicationView {

    // Eventhandler to handle WM_PAINT event.
    long    paint(Event& event)
    {
        //Create an instance of PaintDC.
        PaintDC pdc(this);
        RECT    r;
        getClientRect(&r);
        int w = r.bottom/255+1;
        for(int i = 0; i < 255; i++) {
            Pen pen(PS_INSIDEFRAME, w+2, RGB(255, 255, 255-i) );
            //Select the pen for PaintDC.
            HGDIOBJ prev = pdc.select(&pen);

            //Draw a line.
            pdc.moveTo(0, w*i, null);
            pdc.lineTo(r.right, w*i);

            //Select the previous pen to deselect the pen instance.
            pdc.select(prev);
        }
        return 0L;
    }

  public:
    MainView(Application& applet, const TCHAR* label, Args& args)
        :ApplicationView(applet, label, args)
    {
        // Register paint method of this class for the WM_PAINT event.
        addEventHandler(WM_PAINT, this, (Handler)&MainView::paint, null);
    }
};
}
|
6.3 Brush
(1) Explanation
Class Brush represents a brush object of Windows.
To use Pen class, follow the below steps:Step1: Create an instance of a subclass(PaintDC or ClientDC) of DC.
Step2: Create an instance of Brush.
Step3: Call select method of DC class to select the Brush instance for the DC instance.
Step4: Call a drawing method of the DC instance.
Step5: Deselect the Brush instance from the DC instance.
(2) Example
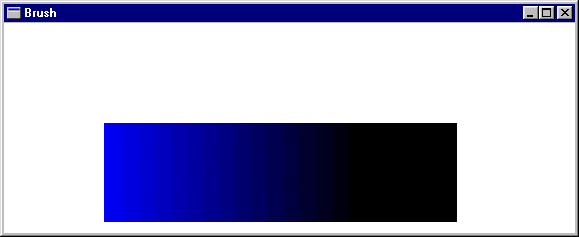
#include <sol\ApplicationView.h>
#include <sol\StockObject.h>
#include <sol\PaintDC.h>
#include <sol\Brush.h>

namespace SOL {

class MainView :public ApplicationView {

    // Eventhandler to handle WM_PAINT event.
    long    paint(Event& event)
    {
        //Create an instance of PaintDC.
        PaintDC pdc(this);
        RECT    r;
        getClientRect(&r);
        int w = r.bottom/255+1;
        StockObject pen(NULL_PEN);
        pdc.select(&pen);
        for(int i = 0; i < 255; i++) {
            Brush* brush = new Brush(RGB(0, 0, 255-i) );
            //Select the pen for PaintDC.
            HGDIOBJ prev = pdc.select(brush);
            pdc.rectangle(100+i, 100, 200+i, 200);
            //Select the previous brush to deselect the pen instance.
            pdc.select(prev);
            delete brush;
        }
        return 0L;
    }

  public:
    MainView(Application& applet, const TCHAR* label, Args& args)
        :ApplicationView(applet, label, args)
    {
        // Register paint method of this class for the WM_PAINT event.
        addEventHandler(WM_PAINT, this, (Handler)&MainView::paint, null);
    }
};
}
|
6.4 Font
(1) Explanation
Class Font represents a font object of Windows.
To use Font class, follow the below steps:Step1: Create an instance of Args.
Step2: Set parameters for Font to the Args instance.
Step3: Call a constructor to create an instance of Font or call create method.
Step4: Call setFont method of class View, if you change the font of a View instance.
(2) Example

#include <sol\ApplicationView.h>
#include <sol\ScrolledText.h>
#include <sol\Font.h>

namespace SOL {

class MainView :public ApplicationView {
    ScrolledText text;
    Font*        font;
    Font     defaultFont;
  public:
    MainView(Application& applet, const TCHAR* label, Args& args)
        :ApplicationView(applet, label, args)
    {
        Args ar;
        text.create(this, _T(""), ar);

        ar.reset();
        ar.set(XmNheight, (-30));
        ar.set(XmNfaceName,  _T("Symbol"));
        ar.set(XmNweight,  FW_BOLD);

        //Create an instance of Font.
        font = new Font(ar);
        text.setFont(font);

        ar.reset();
        defaultFont.create(ar); //Call a create method

        //Add this text to the defaultLayoutManager.
        add(text);
    }

    ~MainView()
    {
        delete font;
    }
};
}
|
7 Thread and Process
(1) Class hierachy
Object | +--Thread | +--Pipe | +--Process |
7.1 Thread
(1) Explanation
Class Thread represents a thread in Windows. In order to use Thread class of SOL9, you have to follow the next steps.Please note that a thread instance created by a constructor of subclass of Thread is in suspended state. Do not forget to call start method to start it.
(2) Example
#include <sol\Application.h>
#include <sol\Thread.h>
#include <sol\Stdio.h>

namespace SOL {

//1 Define a subclass of Thread.
class StopWatch :public Thread {
    int     seconds;
  public:
    StopWatch(int interval) {
        seconds = interval;
    }

    //2 Define a run method.
    void run() {
    int n = 0;
    while (n < seconds) {
        sleep(1000);
        // Do something here.
        Printf(_T("StopWatch %d\r\n", n++);
        }
    }
};
}

void Main(int argc, TCHAR** argv)
{
    const TCHAR* appClass = _T("StopWatch");
    Application applet(appClass, argc, argv);

    //3 Create an instance of your subclass of Thread.
    StopWatch stopWatch(10);

    MessageBox(NULL, _T("Thread starts"), _T("StopWatch"), MB_OK);
    //4 Call a start method of Thread class.
    stopWatch.start();

    //5 Call a wait method of Thread class.
    stopWatch.wait();

    MessageBox(NULL, _T("Thread terminated"), _T("StopWatch"), MB_OK);
}
|
7.2 Pipe
(1) Explanation
Class Pipe represents a pipe in Windows.
This class has three constructors:
Pipe(int buffsize = 1024); Pipe(Pipe& pipe); Pipe(Pipe* pipe); |
(2) Example
See an example program of Process class.
7.3 Process
(1) Explanation
Process class represents a process in Windows. This class has three constructors:
Process(const TCHAR* command, DWORD flag = DETACHED_PROCESS); Process(const TCHAR* command, Pipe& pipe, DWORD flag = DETACHED_PROCESS); Process(const TCHAR* command, Pipe* pipe, DWORD flag = DETACHED_PROCESS); |
One of the simplest usage of Process class is to use the first constructor in the following way. Note that you can wait infinitely a termination of a process by calling wait method of Process class.
void    Main(int argc, TCHAR** argv)
{
    const TCHAR* command = _T("notepad.exe");
    // Create an instance of Process class for notepad.exe program.
    Process process(command);

    // Wait a termination of the above process.
    process.wait();
}
|
(2) Example
#include <sol\ApplicationView.h>
#include <sol\Process.h>
#include <sol\Thread.h>
#include <sol\Pipe.h>
#include <sol\Stdio.h>

namespace SOL {

// Reader thread in parent process to read an output from a child process.
class PipeReader :public Thread {
    HANDLE hReader;
    Pipe*   pipe;
public:
    PipeReader(Pipe* p) :pipe(p) { }
    void run();
};

void PipeReader::run()
{
    char buffer[256];
    while (True) {
        unsigned long len = 0;
        len = pipe -> read(buffer, sizeof(buffer)-1);
        if (len>0) {
            buffer[len] = Zero;
	    String string = buffer;
            Printf(_T("%s"), (const TCHAR*)string);
        } else {
            break;
        }
    }
}

// Sample ChildProcess class to launch a child process.
class ChildProcess :public Object {
    Process* child;
    Pipe*   pipe;
    Pipe*   dupPipe;
    PipeReader* reader;
public:
    // Constructor
    ChildProcess(const TCHAR* command) {
        // 1 Create an inheritable pipe.
        pipe = new Pipe();

        // 2 Duplicate a noninheritable pipe of the above pipe.
        dupPipe =new Pipe(pipe);

        // 3 Create an instance of Process, using a pipe to communicate
        // this parent and child process.
        child = new Process(command, pipe);

        // 4 Close the pipe.
        pipe ->close();

        // 5 Create an instance of PipeReader thread to read an output of
        // the child process from the duplicated pipe of this process.
        reader = new PipeReader(dupPipe);

        // 6 Start the pipeReader thread.
        reader -> start();

        // 7 Wait a completion of the child process.
        child -> wait();
    }

    ~ChildProcess() {
        delete child;
        delete pipe;
        delete dupPipe;
        delete reader;
    }
};

}

void    Main(int argc, TCHAR** argv)
{
    Printf(_T("Main() >>\r\n"));
    const TCHAR* command = _T("cgi.exe");
    //Create an instance of Process class.
    ChildProcess* child = new ChildProcess(command);
    delete child;

    Printf(_T("<< Main() \r\n\r\n"));
}
|
8 Socket
(1) Class hierachy
Object | +--InetAddress | +--SocketSelector | +--Socket | +--SocketStream |
8.1 Client
(1) Explanation
Class Socket represents a socket. To use Socket or SocketStream of SOL9 from a client side, you have to follow the next steps.
(2) Example
#include <sol\Application.h>
#include <sol\ScrolledRichText.h>
#include <sol\SocketStream.h>
#include <sol\Thread.h>
#include <sol\Stdio.h>
#include <sol\StringT.h>

namespace SOL {

// Simple HttpClient program.
class HttpThread :public Thread {
    ScrolledRichText& richText;
    StringT<char>      host;
public:
    // Constructor
    HttpThread(ScrolledRichText& text, const char* ahost)
        :richText(text),
        host(ahost) { }

    // Thread procedure
    void run() {
        //1 Create an instance of SocketStream.
        SocketStream socket(AF_INET, 0);

        //2 Create an instance of InetAddress by specifying host name
        //and port number.
        InetAddress address((const char*)host,  80);

        //3 Call a connect method of Socket to connect to the host.
        socket.connect(address);

        //4 Send a request data to the host.
        socket.printf("GET /index.html HTTP/1.0\r\n\r\n");

        //5 Receive a response data from the host.
        int size = 0;
        char buffer[1024];
        while ( (size = socket.recv(buffer, sizeof(buffer)-1, 0)) >0) {
            buffer[size]= Zero;
            // Append the received data to a ScrolledRichText instance.
            richText.append(buffer);
        }
        // 6 Close the socket.
        socket.close();
    }
};


//HttpClinet class
class HttpClient :public ApplicationView {
    ScrolledRichText  richText;
    HttpThread*       thread;

  public:
    //Constructor
     HttpClient(Application& applet, const TCHAR* caption, Args& args)
        :ApplicationView(applet, caption, args) {

        Args ar;
        richText.create(this, _T(""), ar);
        add(richText);
        //Create an instance of HttpThread and start it.
        thread = new HttpThread(richText, "localhost");	//11/13 char
        thread->start();
    }

    ~HttpClient() {
        delete thread;
    }
};
}

// Sample main
void Main(int argc, TCHAR** argv)
{
    static const TCHAR* appClass = _T("HttpClient"));
    Application applet(appClass, argc, argv);

    Args args;
    args.set(XmNclassName, appClass);

    HttpClient client(applet, appClass, args);
    client.realize();
    applet.run();
}
|
8.2 Server
(1) Explanation
To use Socket or SocketStream of SOL9 on a server side, you have to create a listener thread to wait and accept a connection-request from a clinet, and a request-handler thread to exchange real data between the client and the request-handler. In general, you have to follow the next steps.
Client ListenerThread RequestHandlerThread | | bind | | listen | connect | accept | --------> | | | new RequestHandlerThread | | | | | send /recv | | <--------------------------------------> | |
(2) Example
#include <sol\ApplicationView.h>
#include <sol\Thread.h>
#include <sol\SocketStream.h>
#include <sol\StringTokenizer.h>
#include <sol\SocketSelector.h>
#include <sol\Date.h>
namespace SOL {
// Communication thread to exchange a request and
// a response between an http client and this http server.
class HttpCommunicator :public Thread {
SocketStream* socket;
public:
HttpCommunicator(SocketStream* sock)
{
socket = sock;
}
void run()
{
StringBufferT<char> buffer;
// Read a request line.
socket->readLine(buffer);
// Read the rest lines, and discard them.
while (1) {
StringBufferT
|
Last modified: 14 Nov 2009
Last modified: 5 May 2016
Copyright (c) 2000-2016 Antillia.com ALL RIGHTS RESERVED.