|
Welcome to Software Laboratory of Antillia.com. Future Windows and Linux Programming |
| SolMailProxy | Version 1.0.0.9 (C) 2008 Copyright Antillia.com |
| Home | FAQ |
| FileType | File Extension | Encryption |
|---|---|---|
| Microsoft Office Word Document | .doc, .docx, .docm | IRM/PWD |
| Microsoft Office Excel Worksheet | .xls, .xlsx, .xlsm, .xlsm, .xlsb | IRM/PWD |
| Microsoft Office PowerPoint Presentation | .ppt, .pps, .pptx, .pptm, .ppsx, .ppsm | IRM/PWD |
| Microsoft XPS Document | .xps | IRM/PWD |
| Adobe Acrobat Document | PWD | |
| WinZip File | .zip | PWD |
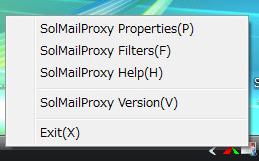
 will be shown on the TaskTray.See Figure 2-1.